Send to Store
The Send to Store feature allows you to transfer products from your current store to another connected Shopify store. This is a one-time copy operation, ideal for populating a new store or sharing products.
Opening Send to Store
- Select products in the main grid
- Open using one of these methods:
- Menu: Targeted Bulk Edit > Send to Store
- Right-click: Send to Store
Transfer Options
Target Store
Select the destination store from the dropdown. Only stores you've connected in HF Product Manager appear here.
Note: You must connect additional stores before using this feature. See Store Management.
Duplicate Handling
Choose what happens if a product already exists in the target store:
| Option | Behavior |
|---|---|
| Skip (don't transfer) | Leave existing product unchanged |
| Update existing product | Overwrite the existing product with source data |
Products are matched by handle (URL slug). Two products with the same handle are considered duplicates.
Product Status
Create as Draft (recommended):
When enabled, transferred products are created as Draft status in the target store. This allows you to:
- Review products before publishing
- Make store-specific adjustments
- Control when products go live
When disabled, products retain their original status (Active, Draft, or Archived).
Transfer Tag
Add a tag to transferred products for easy identification:
- Enable Add tag to transferred products
- Enter the tag text (e.g., "transferred-from-main-store")
This helps you:
- Identify transferred products later
- Filter and manage transferred items
- Track product origins
Inventory Options
Choose how inventory levels are handled:
| Option | Description |
|---|---|
| Set to 0 | Start with zero inventory (default) |
| Copy from source | Use the same quantities as the source store |
| Set to custom value | Specify a fixed quantity for all variants |
| Skip (don't set) | Don't set inventory levels |
Note: Target store must have at least one inventory location. Inventory is set at the default location.
Add to Collection
Optionally add transferred products to a collection in the target store:
- Select a collection from the dropdown
- Products are added after transfer completes
Collections are loaded from the target store. Only manual collections are shown (not smart collections).
Copy Source Collection Memberships
Enable Copy source collection memberships to recreate the source product's collection assignments in the target store. Collections are matched by handle (URL slug) -- if a collection with the same handle exists in the target store, the product is added to it automatically.
Collections that don't exist in the target store are silently skipped. This option works alongside the "Add to Collection" dropdown above; both can be used together.
Publish to Matching Sales Channels
Enable Publish to matching sales channels (enabled by default) to publish transferred products to the same sales channels they are published to in the source store. Channels are matched by name -- for example, if a product is published to "Online Store" in the source, it will be published to "Online Store" in the target if that channel exists.
When disabled, transferred products are not published to any sales channel and must be published manually in the target store.
Metafields
Include metafields:
When enabled, custom metafield data is transferred with products.
Important: Metafield definitions must exist in the target store before transfer. The warning panel shows which definitions are needed.
To prepare the target store:
- Note the required metafield definitions shown in the warning
- In Shopify Admin for the target store, create matching definitions
- Ensure namespace, key, and type match exactly
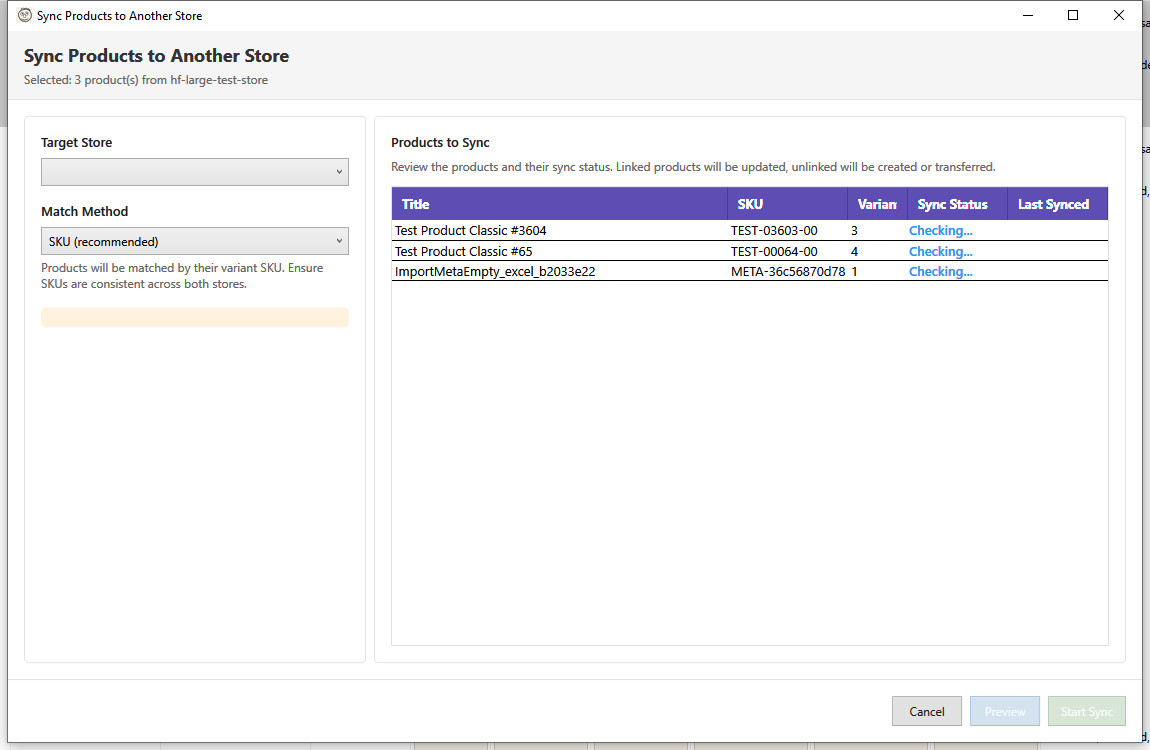
Preview Panel
The right side shows products to be transferred:
| Column | Description |
|---|---|
| Title | Product name |
| Handle | URL handle (used for duplicate detection) |
| Variants | Number of variants |
| Images | Number of images |
| Status | Current product status |
Review this list to confirm you're transferring the intended products.
Transfer Process
Starting the Transfer
- Configure all options
- Review the preview list
- Click Start Transfer
- Confirm when prompted
During Transfer
- Progress bar shows current product being transferred
- Status messages indicate what's happening
- Cancel button available if needed
Transfer Results
After completion, the results panel shows:
| Status | Meaning |
|---|---|
| Success (green) | Product transferred successfully |
| Failed (red) | Transfer failed - see error message |
| Skipped (orange) | Product skipped (duplicate, already exists) |
The summary shows counts:
- Success: Products created/updated in target
- Failed: Products that couldn't be transferred
- Skipped: Products skipped due to duplicates
What Gets Transferred
Always Transferred
- Product title, description, vendor, type
- Tags
- Product status
- Variants (all options and option values)
- Prices and compare-at prices
- SKUs, barcodes
- Weight and dimensions
- SEO title and description
Transferred with Images
- All product images
- Image alt text
- Image positions/ordering
- Variant-specific image assignments
Optionally Transferred
- Metafields (if enabled and definitions exist)
- Inventory quantities (based on inventory option)
- Collection memberships (if "Copy source collection memberships" enabled)
- Sales channel publications (if "Publish to matching sales channels" enabled)
Not Transferred
- Product ID (new ID assigned in target)
- Sales data
- Order history
- Customer reviews
- Variant IDs (new IDs assigned)
Common Workflows
Populate a New Store
- Select all products (or filtered set)
- Open Send to Store
- Select the new store
- Enable "Create as Draft"
- Set inventory to zero or custom quantity
- Transfer all products
- Review and publish in target store
Copy Products for Testing
- Connect a development store
- Select products to test with
- Transfer to dev store as Draft
- Test changes in dev store
- Apply verified changes to production store manually
Share Products with Partner
- Select products to share
- Transfer to partner's store
- Add a "source" tag for tracking
- Partner adjusts prices/descriptions as needed
Auto-Close Option
Enable Close automatically on success to close the dialog when all products transfer successfully. Useful for scripted or batch operations.
Best Practices
- Start with drafts - Transfer as Draft to review before publishing
- Use tags - Add transfer tags for tracking
- Check metafields - Create definitions in target before enabling
- Test first - Transfer a few products to verify settings
- Review results - Check for failed/skipped items
Troubleshooting
"No target stores available"
- Connect additional stores first
- Use the Add Store button (+) in the toolbar store panel
- See Store Management
"Transfer failed for some products"
Common causes:
- API rate limiting (wait and retry)
- Network timeout (try fewer products)
- Invalid data in source product
- Target store API permissions
Check the error message column for specific issues.
"Images not transferring"
- Large images may timeout
- Check target store file storage limits
- Verify image URLs are accessible
- Try transferring without images first
"Metafields not appearing"
- Metafield definitions must exist in target
- Namespace and key must match exactly
- Type must be compatible
- Check for typos in definition names
"Duplicate products created"
- Products matched by handle only
- If handles differ, products are considered unique
- Use "Skip" duplicate option to prevent
- Or "Update" to overwrite existing
"Inventory not set correctly"
- Target store needs at least one location
- Inventory set at default location only
- For multi-location, adjust inventory per location after transfer
Keyboard Shortcuts
| Shortcut | Action |
|---|---|
| Enter | Start transfer |
| Escape | Cancel / Close |