Connecting to Shopify
HF Product Manager connects to your Shopify store using the Admin API with client credentials. This guide walks you through the complete setup process.
Video Walkthrough
Watch the full setup process in under 3 minutes:
How to Create a Shopify Custom App for HF Product Manager (YouTube)
Or follow the step-by-step guide below.
Prerequisites
Before connecting, you'll need:
- A Shopify store (any plan)
- Owner or staff account with "Apps" permission
Overview
The setup has three parts:
- Create a custom app in Shopify's Dev Dashboard
- Install the app on your store
- Copy credentials into HF Product Manager
Part 1: Create a Custom App
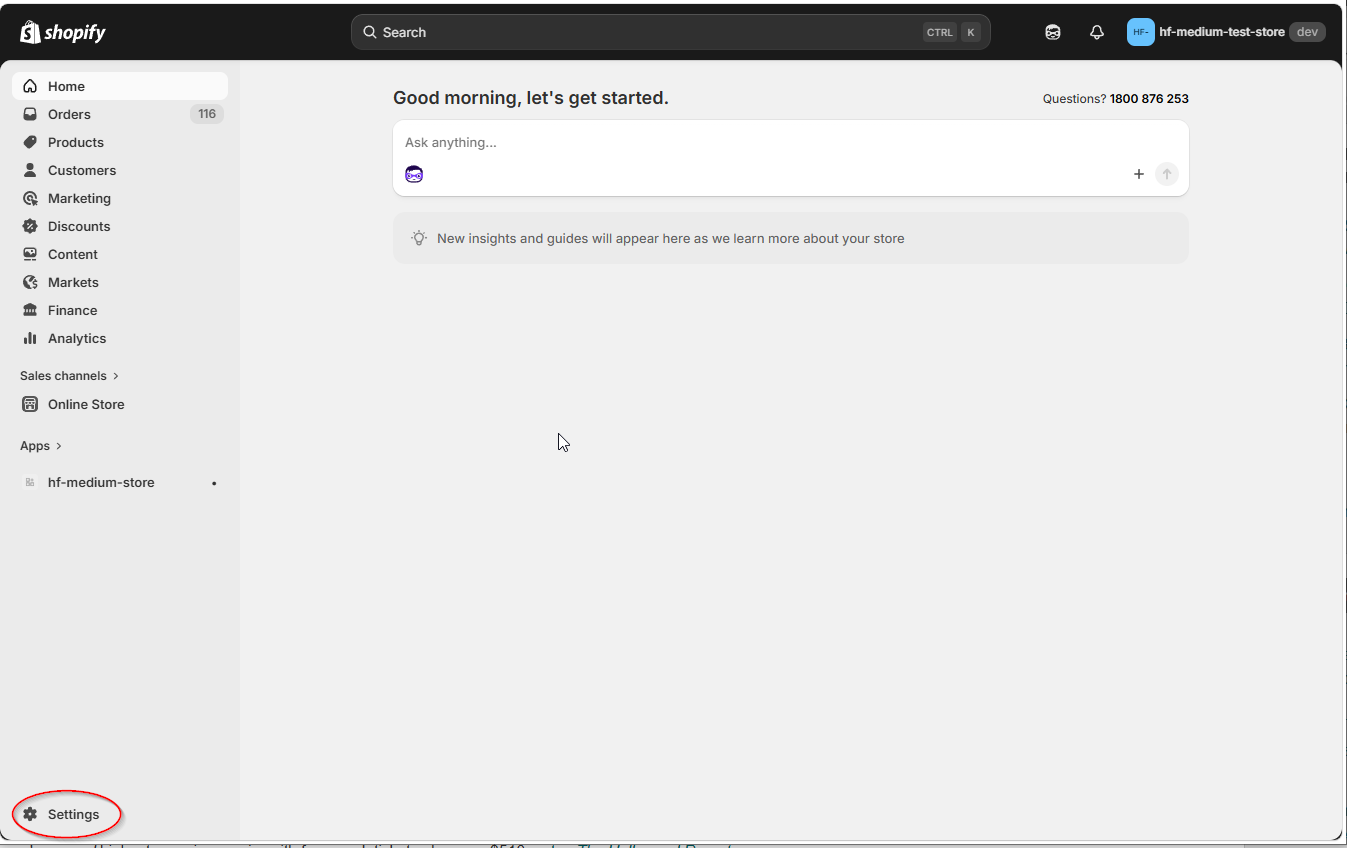
Step 1: Open Shopify Settings
Log in to your Shopify admin and click Settings in the bottom-left corner.
Step 2: Navigate to Apps
In the Settings sidebar, click Apps.
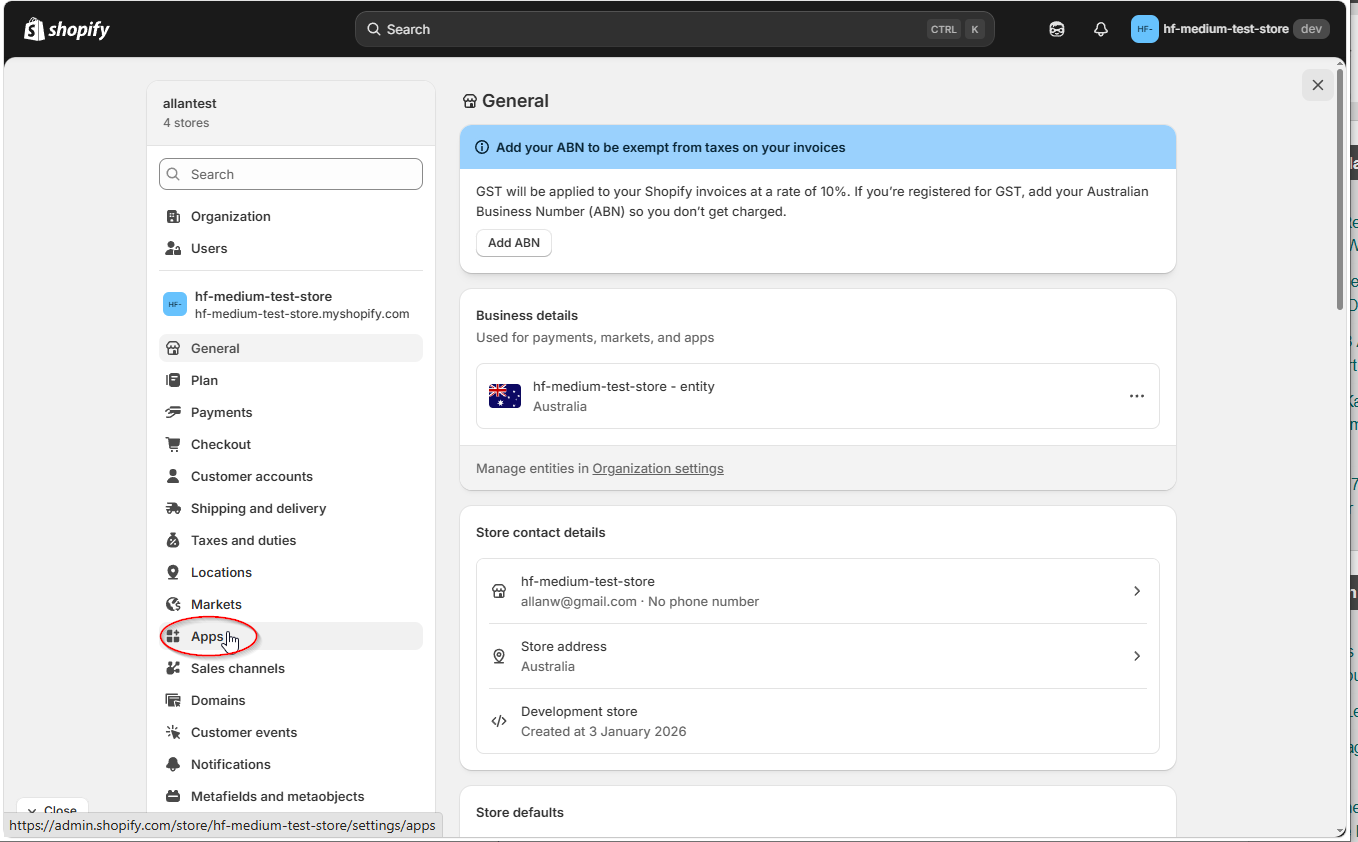
Step 3: Open Developer Apps
On the Apps page, click Develop apps in the top-right corner.
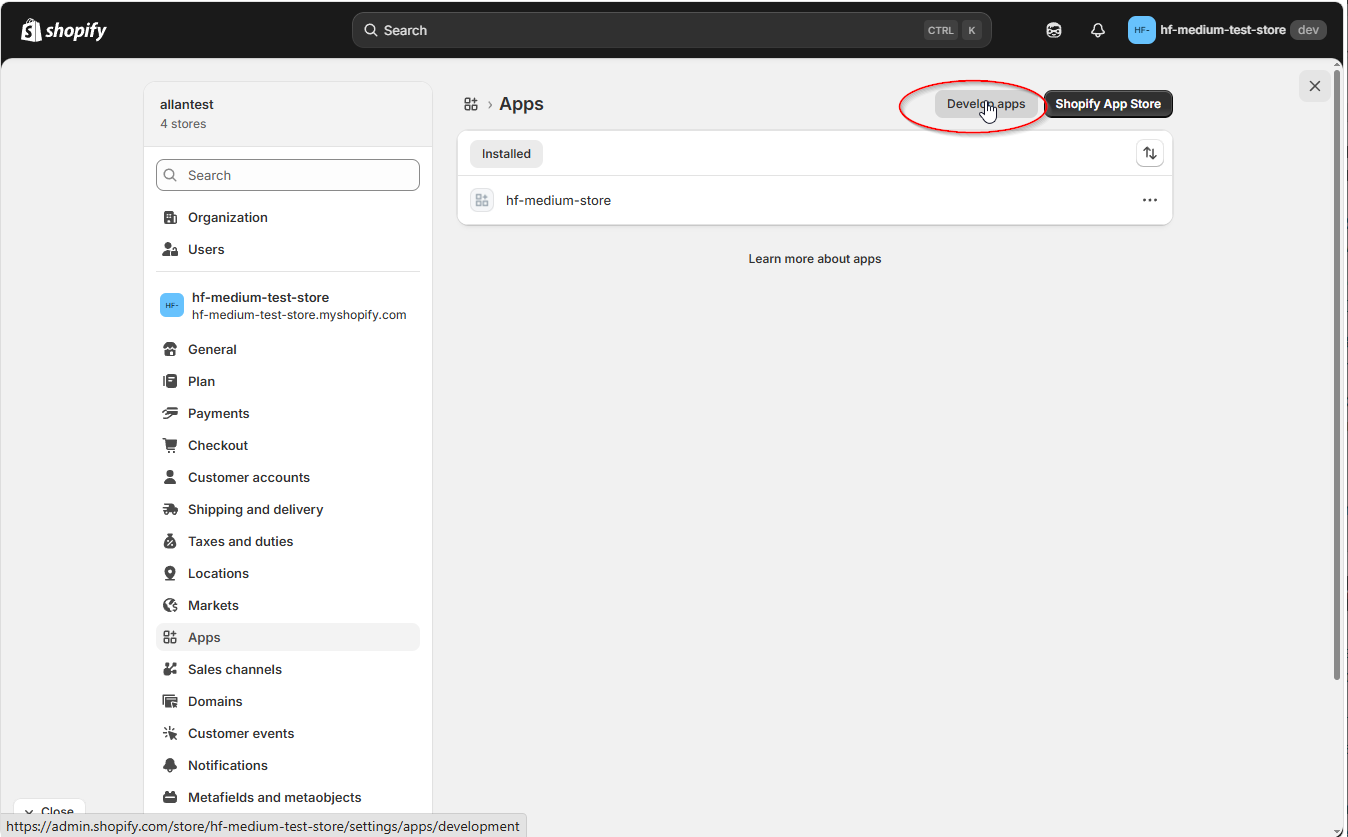
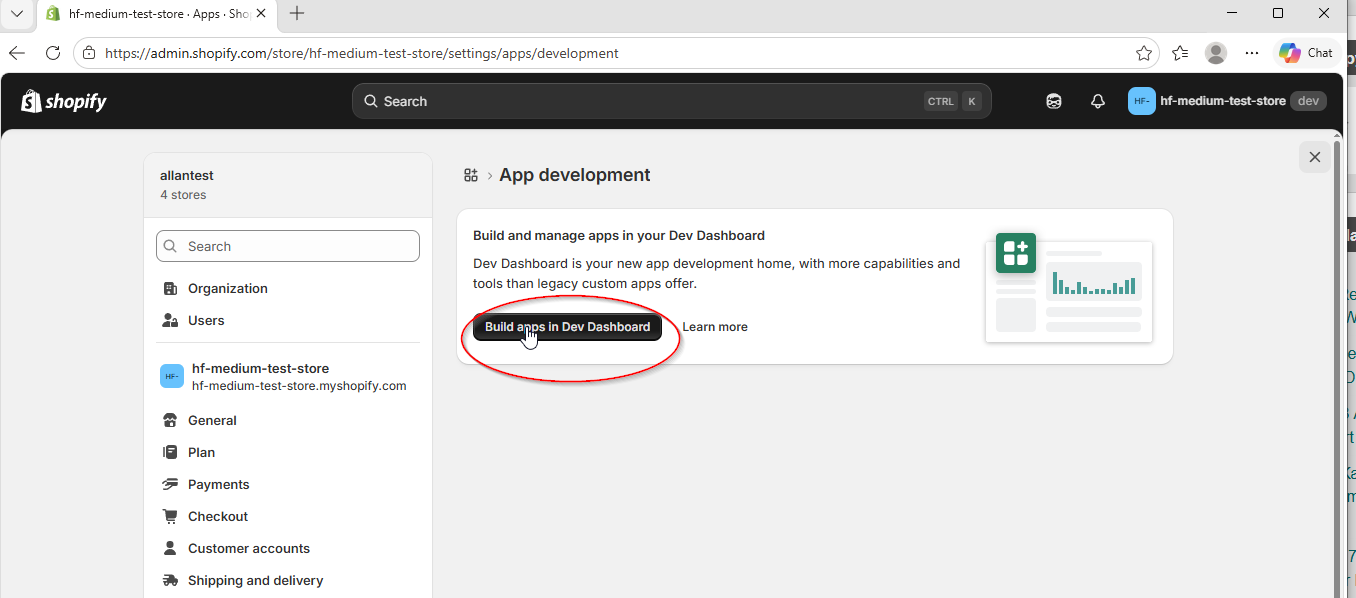
Step 4: Go to Dev Dashboard
Click Build apps in Dev Dashboard to open the Shopify Partners developer dashboard.
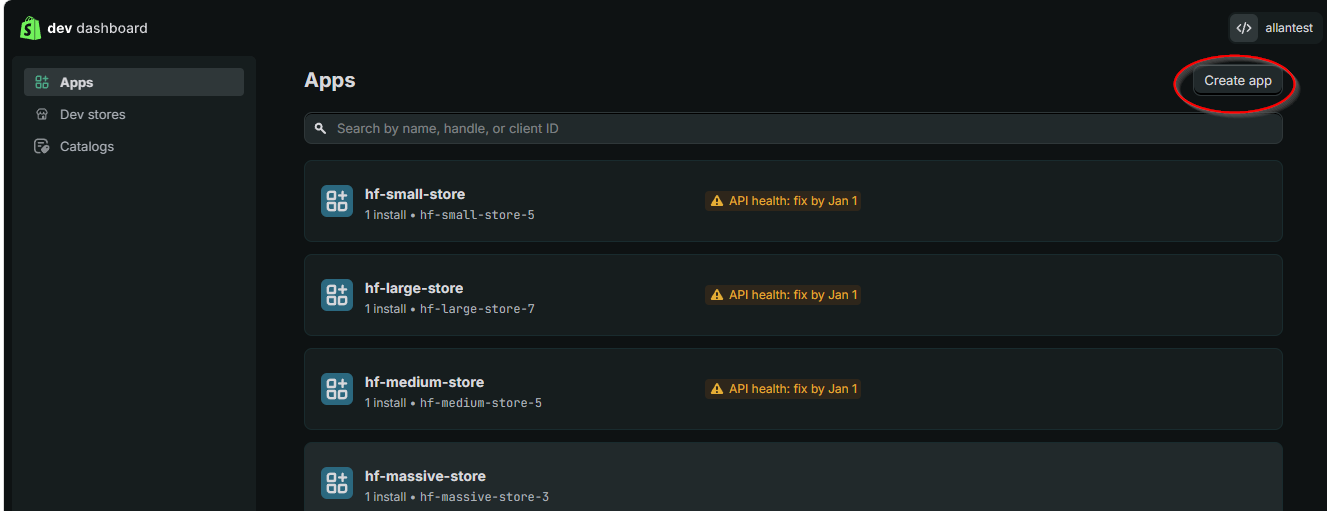
Step 5: Create a New App
In the Dev Dashboard, click Create app in the top-right corner.
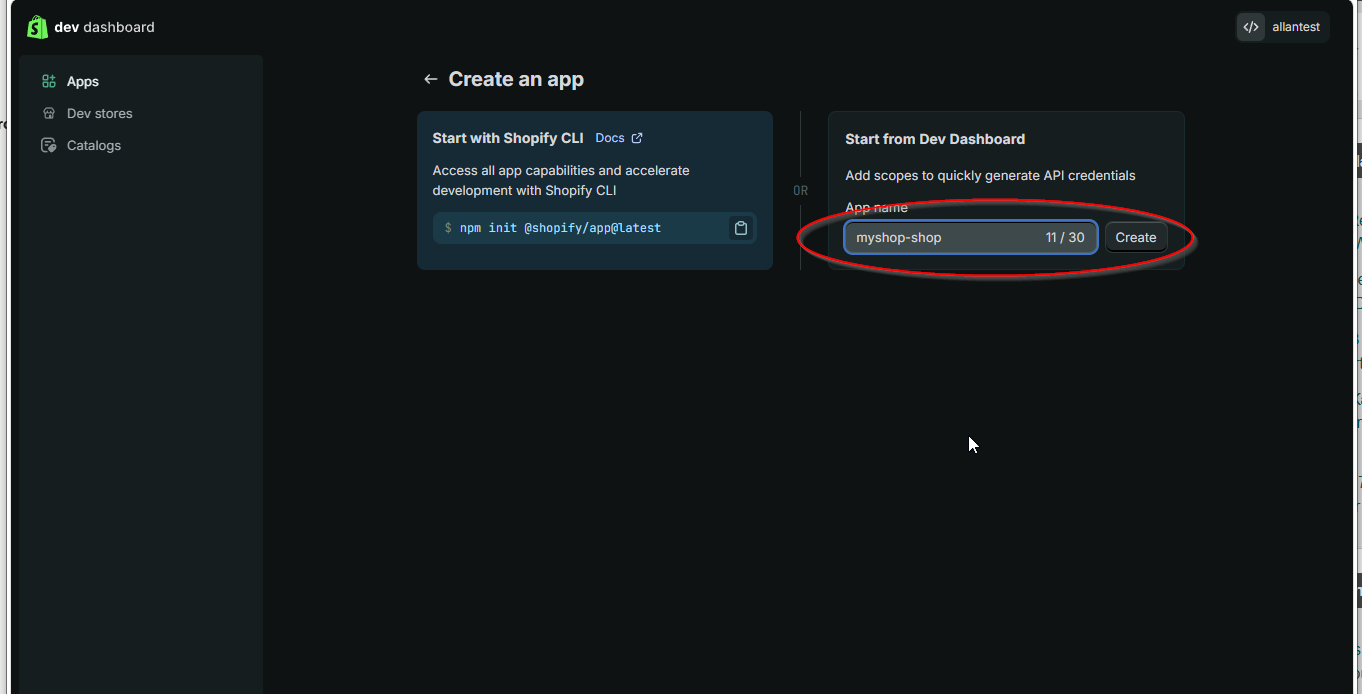
Step 6: Name Your App
Choose Start from Dev Dashboard on the right side. Enter an app name (e.g., "myshop-shop" or "HF Product Manager") and click Create.
Part 2: Configure API Scopes and Release
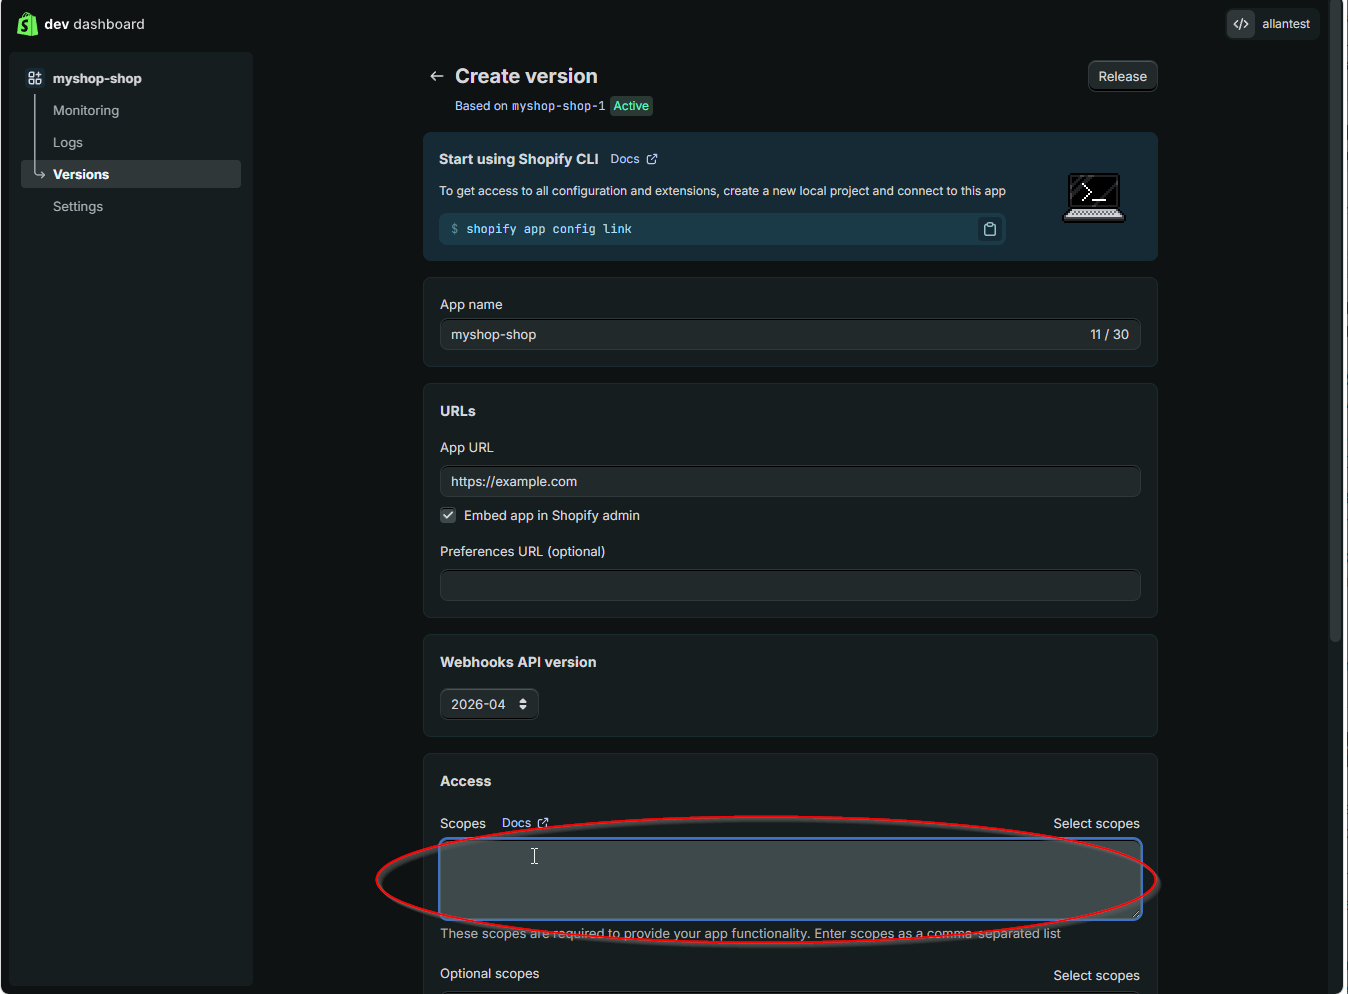
Step 7: Paste API Scopes
On the Create version page, scroll down to the Access section. You'll see a Scopes text field.
In HF Product Manager, click Copy Scope List in the Connect dialog to copy all required scopes. Then paste them into the Scopes field in the Dev Dashboard.
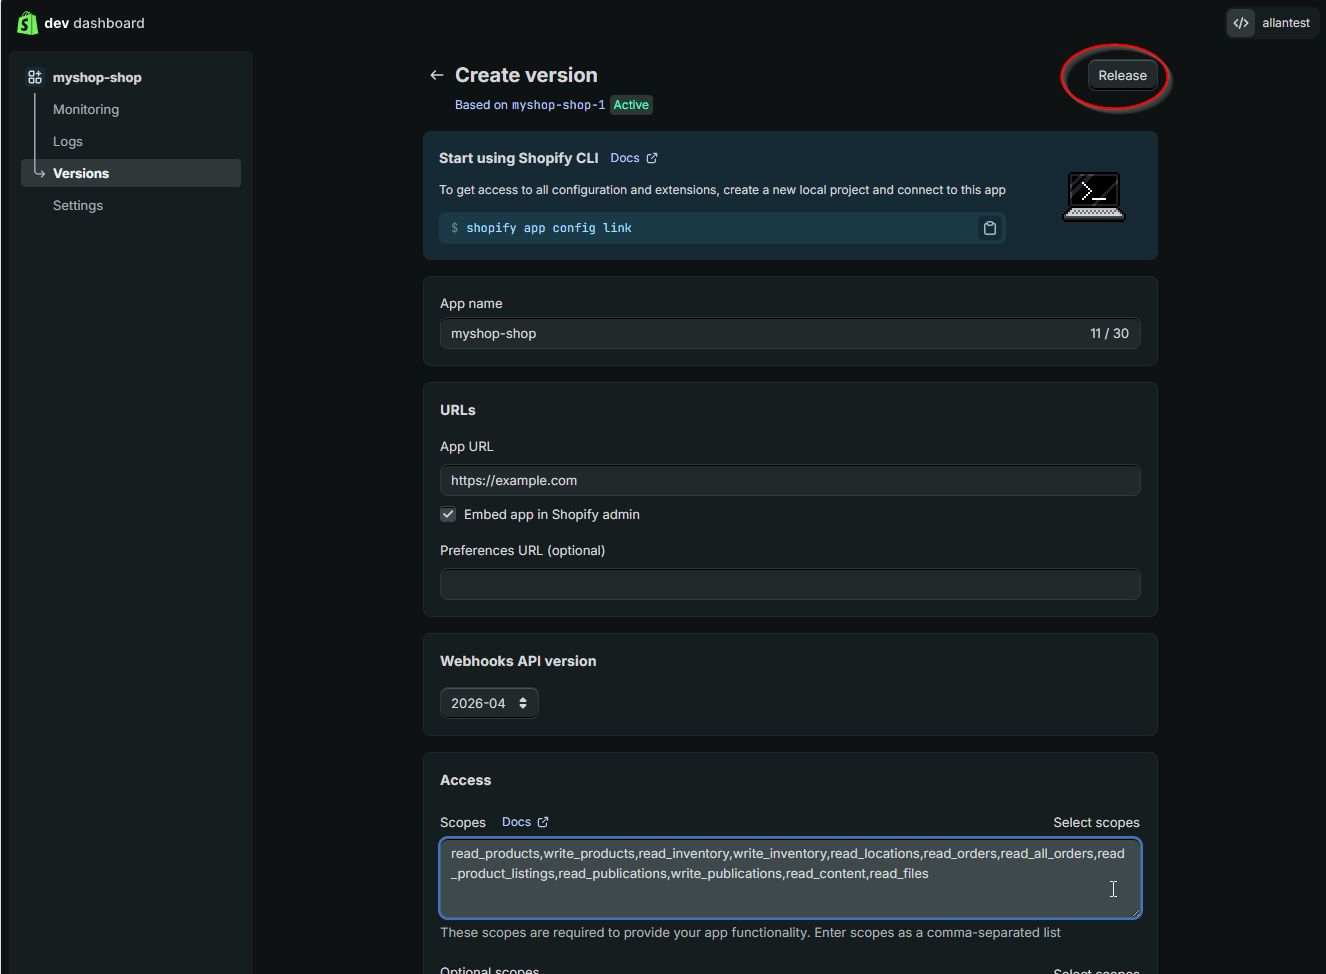
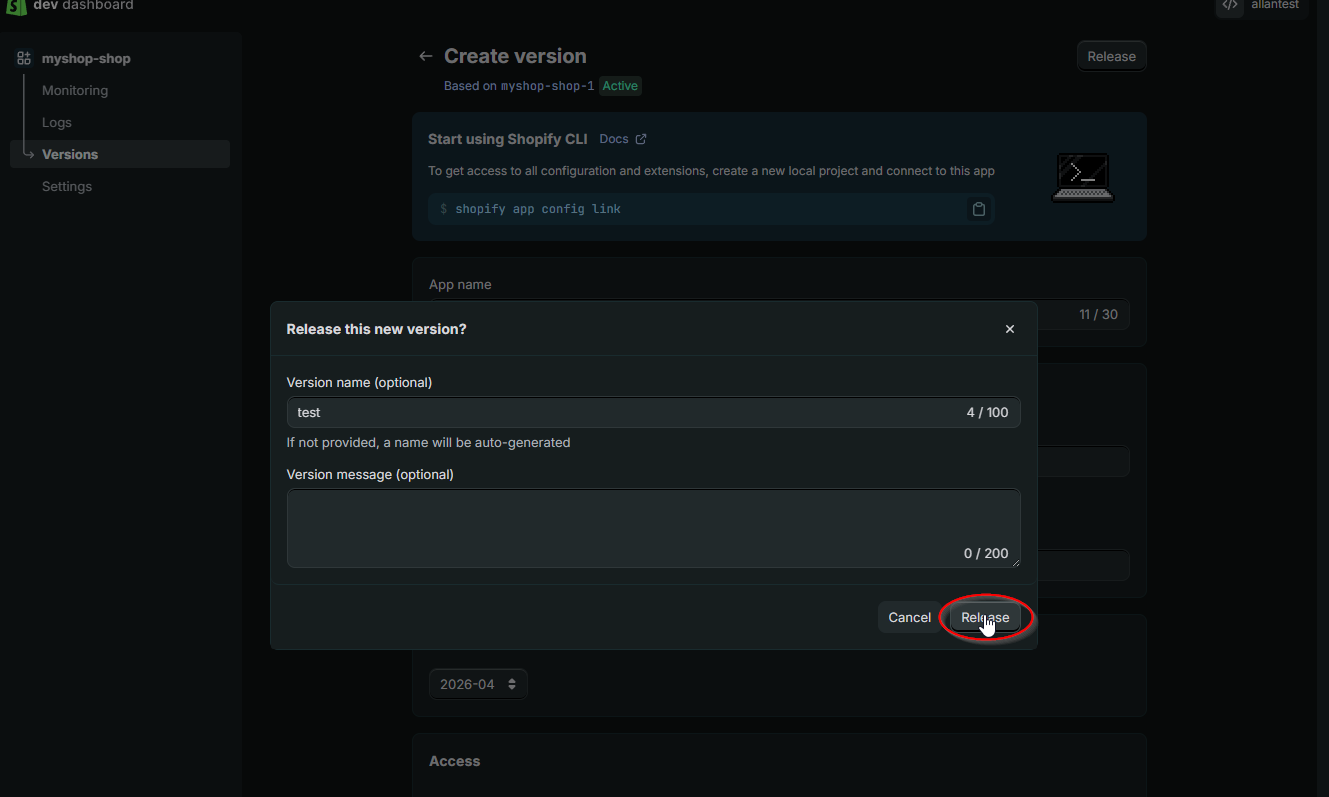
Step 8: Verify Scopes and Release
Confirm the scopes are pasted correctly, then click Release in the top-right corner.
Required Scopes
| Scope | Permission | Used For |
|---|---|---|
read_products |
View products | Product grid, search, filtering |
write_products |
Edit products | Bulk editing, inline editing |
read_inventory |
View inventory | Inventory columns in grid |
write_inventory |
Update inventory | Bulk inventory editing |
read_locations |
View locations | Multi-location support |
read_orders |
View orders | Sales reports and analytics |
read_all_orders |
Full order history | Complete sales data |
read_product_listings |
View listings | Product publishing status |
read_publications |
Channel visibility | Publication management |
write_publications |
Manage channels | Publish/unpublish products |
read_content |
View pages | Page reference metafields |
read_files |
View files | File reference metafields |
Tip: Using the Copy Scope List button in HF Product Manager ensures you don't miss any required permissions.
Step 9: Confirm the Release
Enter a version name (optional) and click Release.
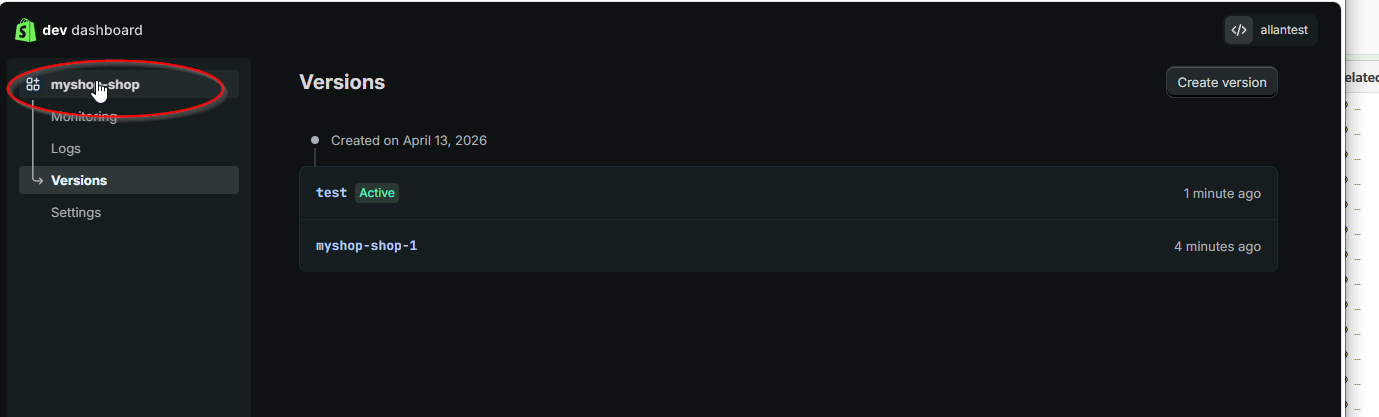
Step 10: Version Released
Your version is now active. Click your app name in the top-left to go to the app overview.
Part 3: Install the App and Copy Credentials
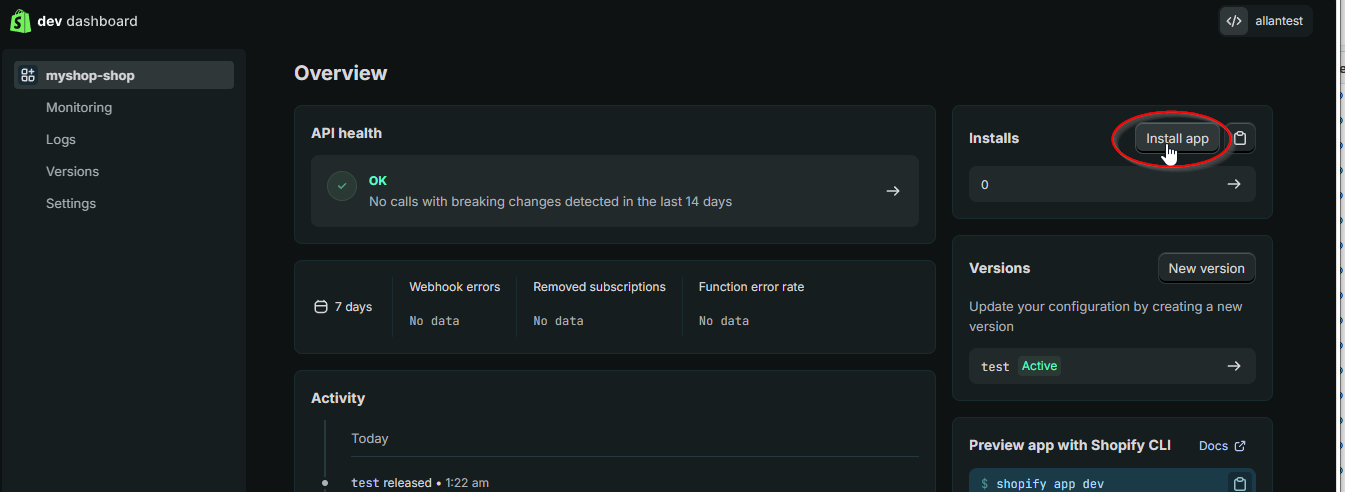
Step 11: Install the App
On the app overview page, click Install app in the top-right Installs panel.
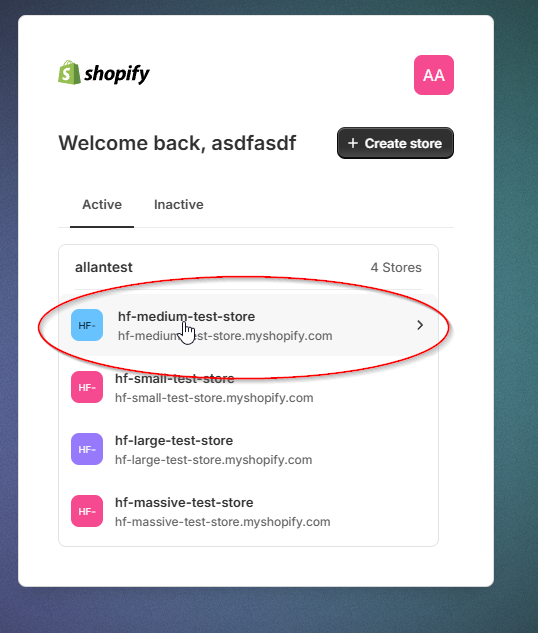
Step 12: Select Your Store
Select the store you want to connect to HF Product Manager.
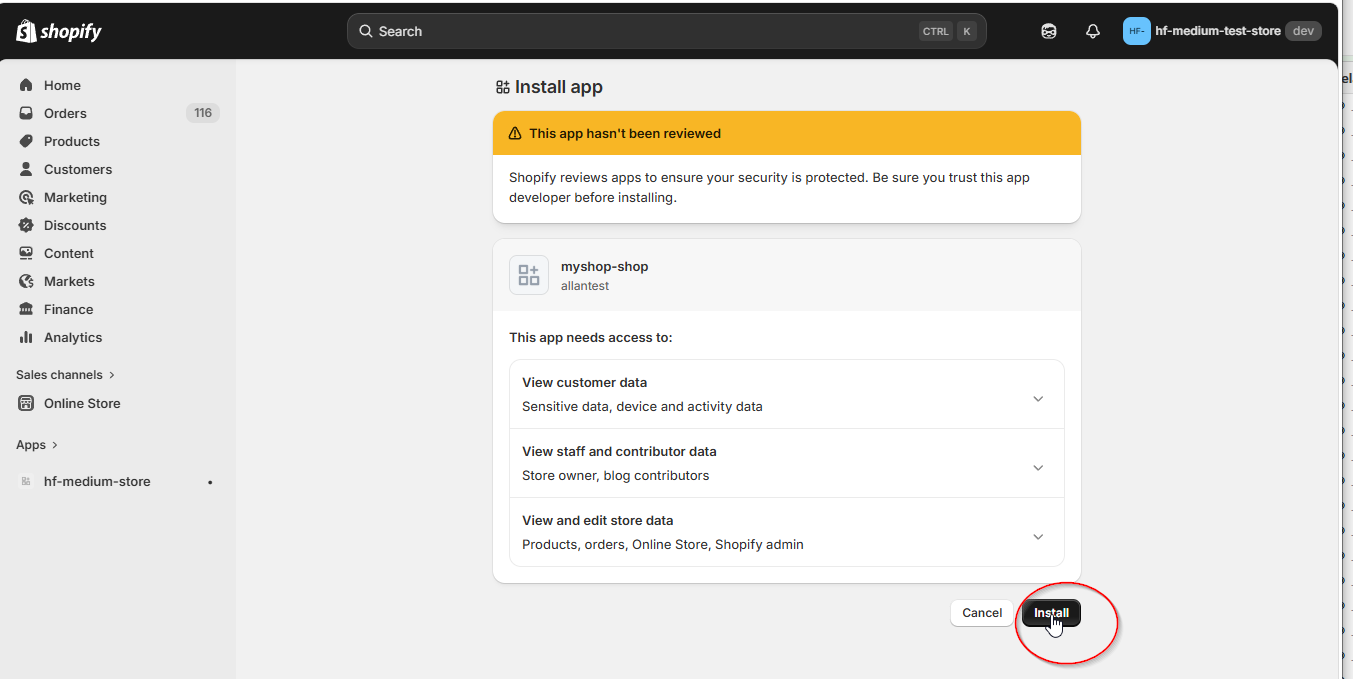
Step 13: Confirm Installation
Review the permissions the app needs and click Install.
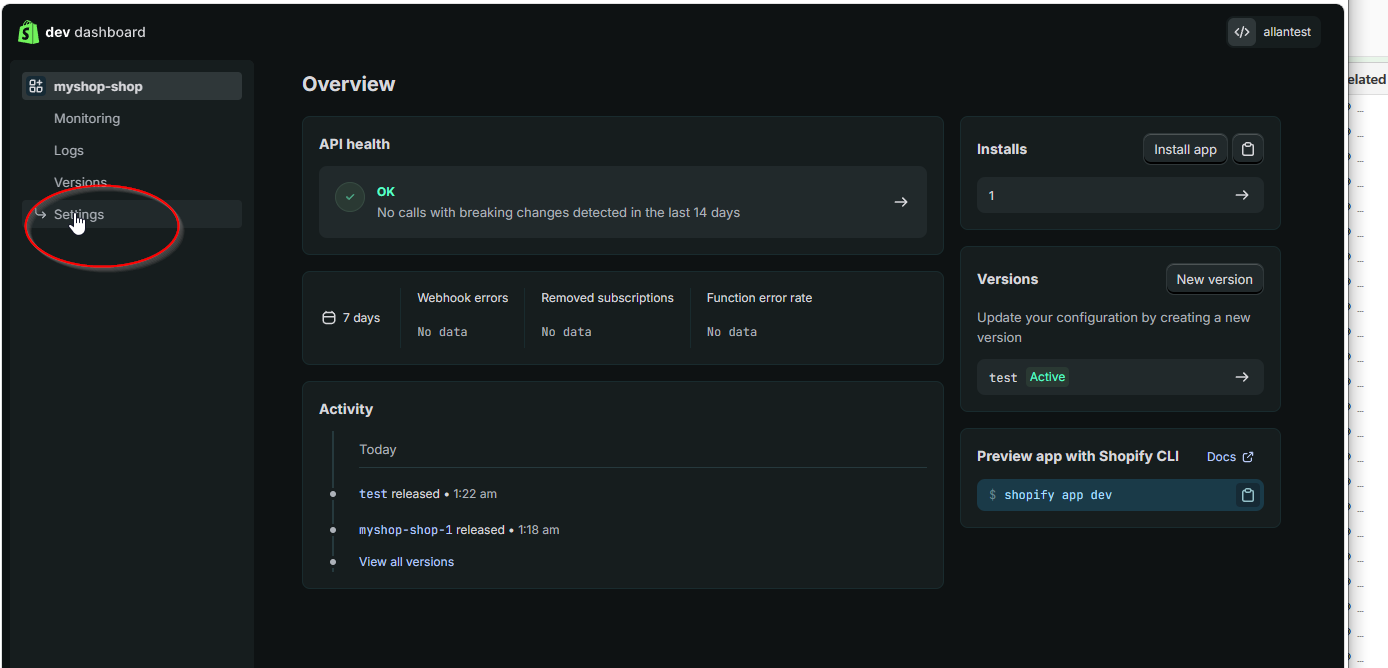
Step 14: Go to App Settings
After installation, click Settings in the left sidebar to view your credentials.
Step 15: Copy Your Credentials
On the Settings page, you'll see your Client ID and Client Secret. Click the copy buttons to copy each one.
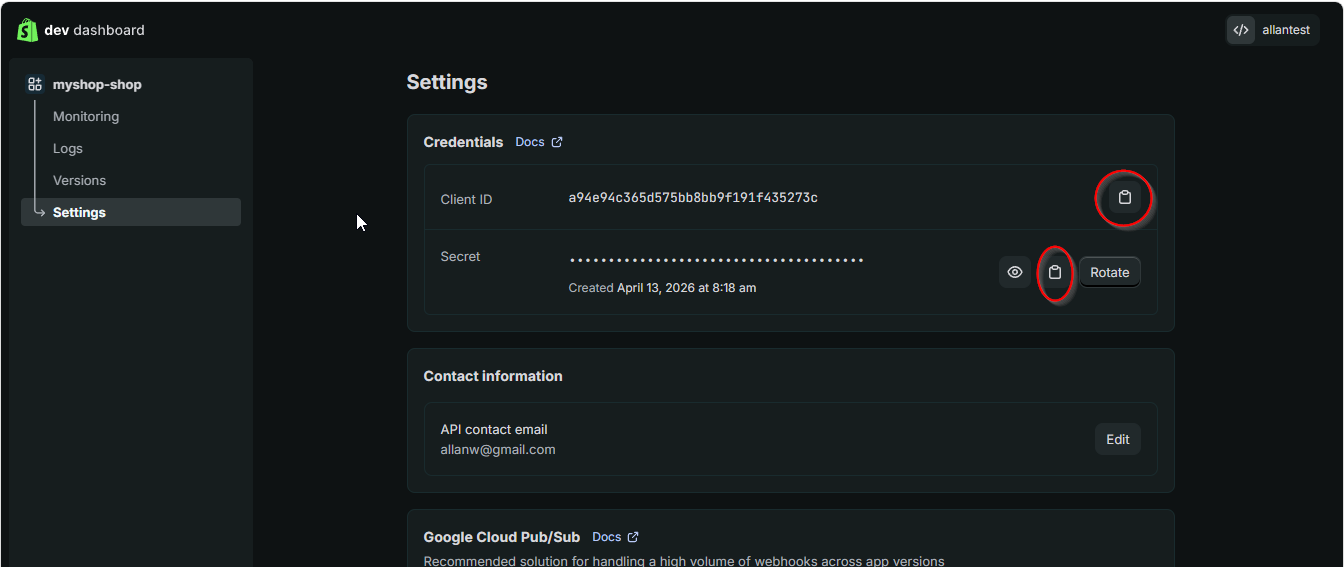
Important: The Client Secret can be revealed with the eye icon and copied. If you need to regenerate it later, click Rotate.
Part 4: Connect in HF Product Manager
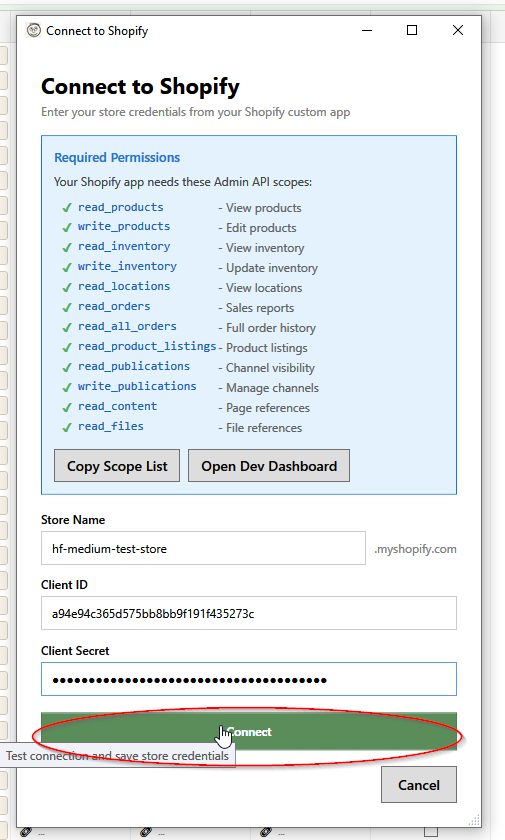
Step 16: Enter Credentials
In HF Product Manager's Connect to Shopify dialog, enter:
| Field | Value |
|---|---|
| Store Name | Your .myshopify.com subdomain (e.g., my-store) |
| Client ID | The Client ID from Step 15 |
| Client Secret | The Client Secret from Step 15 |
Click Connect to validate and save your connection.
HF Product Manager will:
- Validate your credentials
- Check that all required scopes are configured
- Show a warning if any permissions are missing
Scope Validation
After connecting, HF Product Manager validates your app's permissions:
- All scopes present: "Connected successfully!" - Full functionality available
- Missing scopes: Warning showing which permissions are missing and which features won't work
If scopes are missing, you can:
- Go back to the Dev Dashboard and create a new version with the missing scopes
- Release the new version
- Reconnect in HF Product Manager
Troubleshooting
"Invalid Client ID or Secret"
- Double-check you copied the credentials correctly
- Ensure the app is installed (not just created)
- The Client Secret may have been regenerated - check for a newer one
"Access denied"
- Verify the app is installed on the correct store
- Check that required API scopes are enabled in the active version
- Try creating a new version with updated scopes
"Connected with limited permissions"
This means some scopes are missing. HF Product Manager will tell you exactly which ones:
- Go to your app in the Dev Dashboard
- Create a new version with the missing scopes
- Release it and reconnect
"Store not found"
- Check the store name spelling (without .myshopify.com)
- Ensure the store is active (not paused or closed)
Multiple Stores
HF Product Manager supports connecting to multiple Shopify stores:
- Go to File > Add Store or click the + button next to the store dropdown
- Add each store's credentials following the same process
- Switch between stores using the dropdown in the toolbar
- Each store's data is cached separately
Security
- Credentials are encrypted using Windows DPAPI
- Tokens are stored locally, never transmitted except to Shopify
- Access tokens auto-refresh every 24 hours
- For shared computers, consider using separate Windows accounts
Next Steps
Once connected:
- Quick Start Guide - Learn the basics
- Product Grid - Navigate your products
- Bulk Operations - Edit products in bulk