Quick Start Guide
The quickest way to get started is to watch our setup video, or follow the guide below.
Prerequisites
Before you begin, make sure you have:
- Windows 10 or later
- A Shopify store with Admin API access
- Your Shopify store credentials (Client ID and Client Secret)
Step 1: Connect Your Store
- Launch HF Product Manager
- Click Add Store in the welcome dialog (or go to File > Add Store)
- Create a custom app in Shopify and copy your Client ID and Client Secret
- Enter your store name and credentials, then click Connect
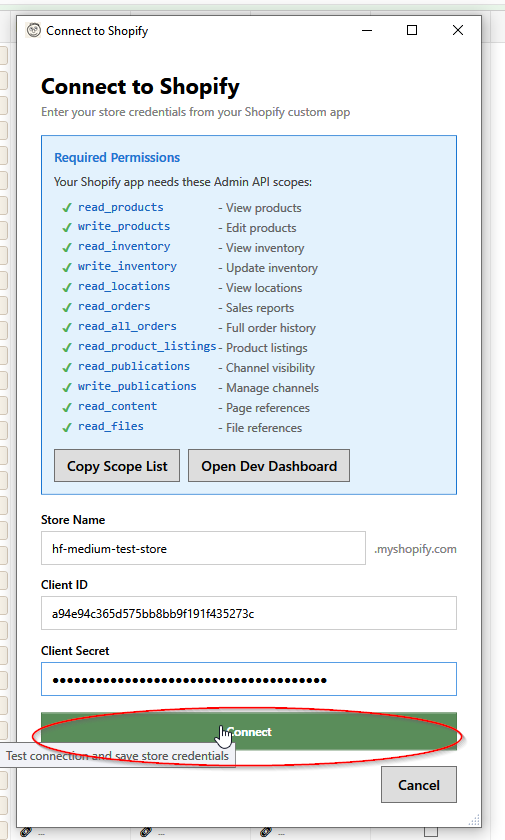
Need help? See the step-by-step connection guide with screenshots for the complete setup process.
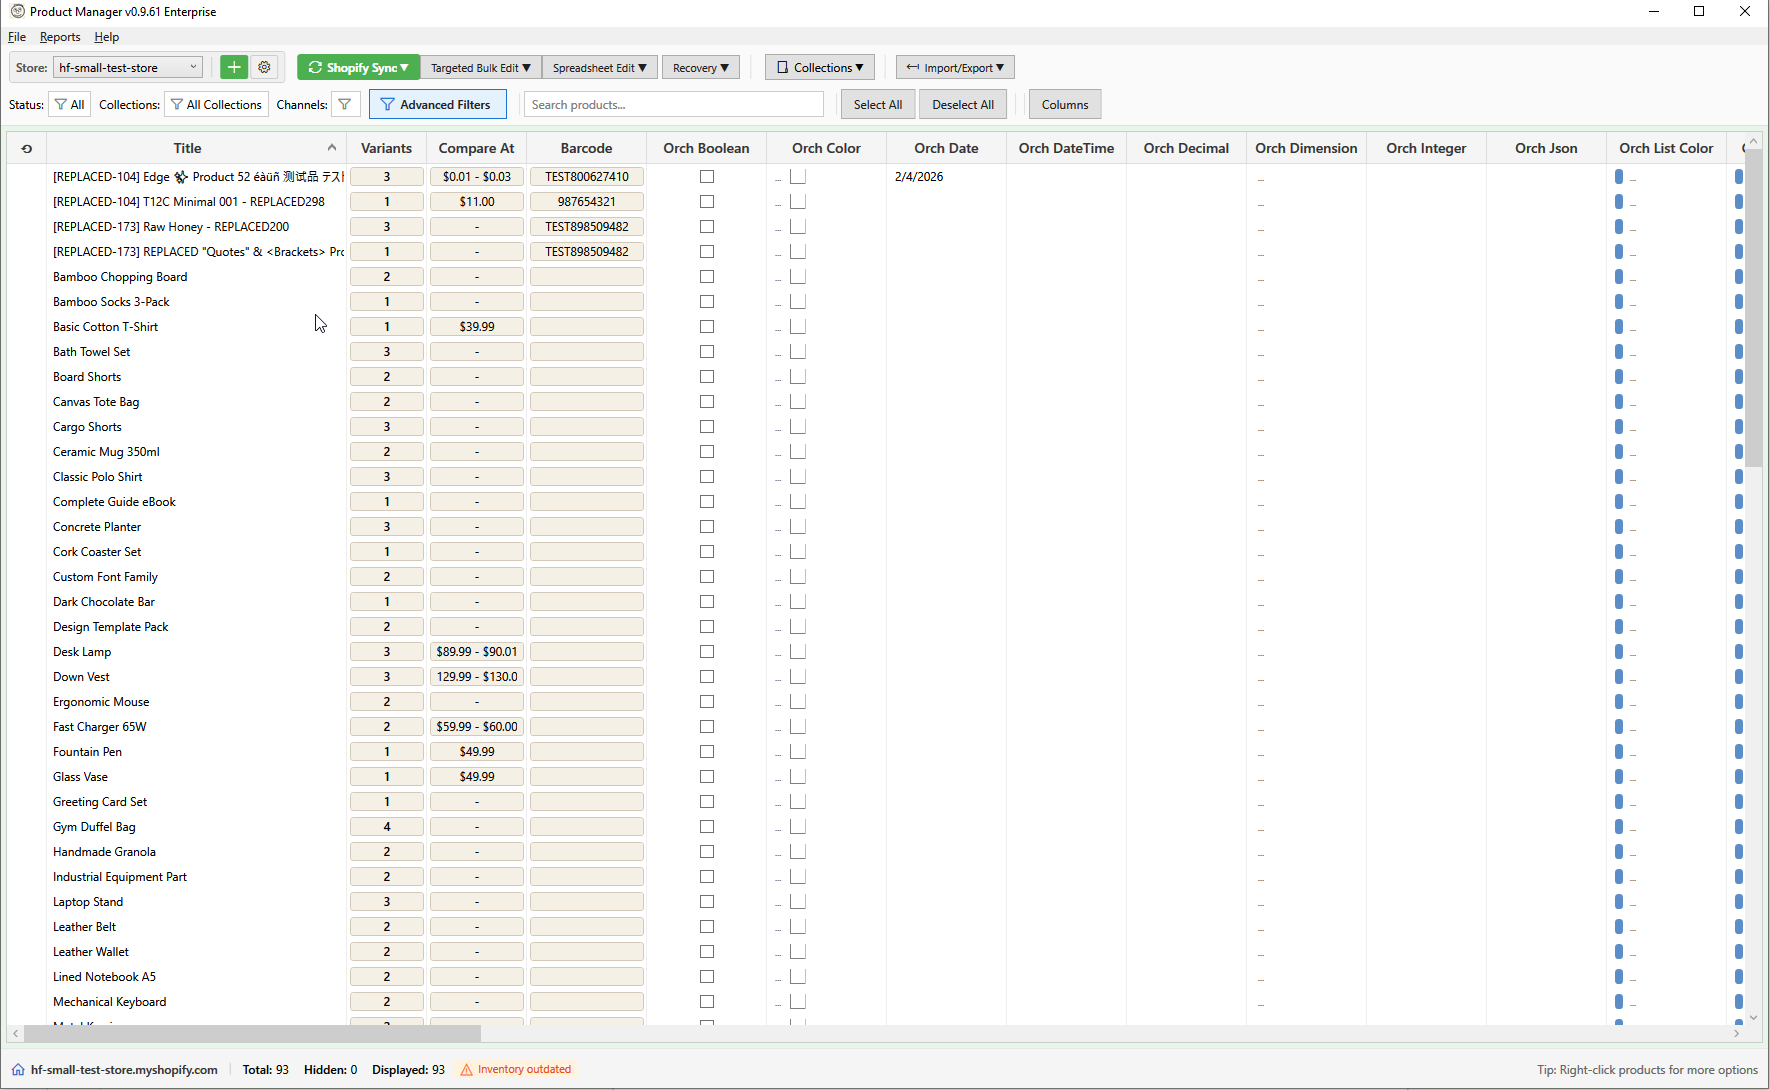
Step 2: Load Your Products
Once connected, HF Product Manager will automatically load your products. You'll see:
- Product titles and status
- Prices and inventory
- Variant counts
- Product types and vendors
Step 3: Search and Filter
Use the search box to find products:
- Click in the Search box (or press
Ctrl+F) - Type your search term
- Results filter automatically
Filter by status using the dropdown:
- All - Show all products
- Active - Published products
- Draft - Unpublished drafts
- Archived - Archived products
Step 4: Select Products
Select products for bulk operations:
| Action | How |
|---|---|
| Single select | Click a row |
| Multi-select | Ctrl+Click multiple rows |
| Range select | Click first, Shift+Click last |
| Select all | Click Select All button or Ctrl+A |
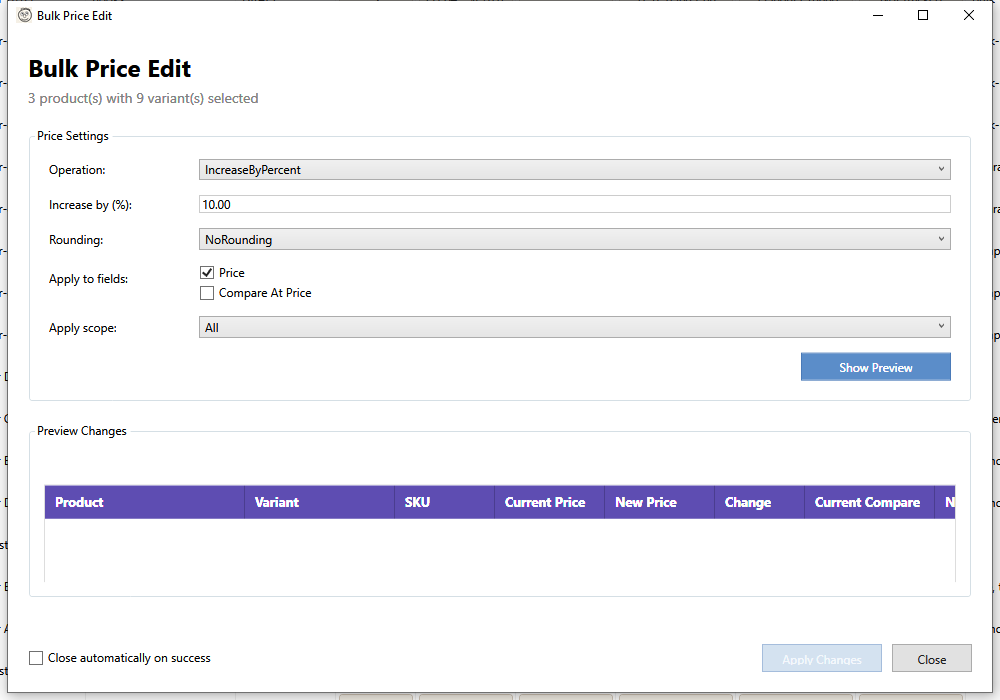
Step 5: Try a Bulk Operation
Let's try a bulk price edit:
- Select 2-3 products in the grid
- Click Targeted Bulk Edit > Prices in the toolbar
- Select operation: Increase by %
- Enter value: 10
- Click Preview to see the calculated changes
- Click Apply to save changes to Shopify
Step 6: Save Your Changes
After making inline edits in the grid:
- Modified cells show a yellow highlight
- Click Save Changes (or press
Ctrl+S) - Changes are synced to your Shopify store
Keyboard Shortcuts
| Shortcut | Action |
|---|---|
F1 |
Open help |
Ctrl+F |
Focus search |
Ctrl+S |
Save changes |
Ctrl+A |
Select all |
Enter |
Open description editor |
Escape |
Cancel/close dialog |
Next Steps
Now that you're familiar with the basics, explore these features:
- Bulk Description Edit - Edit descriptions in bulk
- Import/Export - Import products from files
- Collections - Organize products
- Reports - Analyze your catalog
Getting Help
Press F1 at any time to open context-sensitive help for the current window or feature.