Variant Editor
The Variant Editor allows you to manage product options (like Size, Color) and their resulting variants.
Understanding Options and Variants
- Options - Attributes like Size, Color, Material (max 3 per product)
- Option Values - Specific choices like "Small", "Medium", "Large"
- Variants - Combinations of options that customers can purchase
Example:
- Options: Size (S, M, L), Color (Red, Blue)
- Variants: S/Red, S/Blue, M/Red, M/Blue, L/Red, L/Blue (6 total)
Opening the Variant Editor
- Select a product in the grid
- Open using one of these methods:
- Click the Variants column
- Click Edit Variants in the toolbar
- Right-click and select Edit Variants
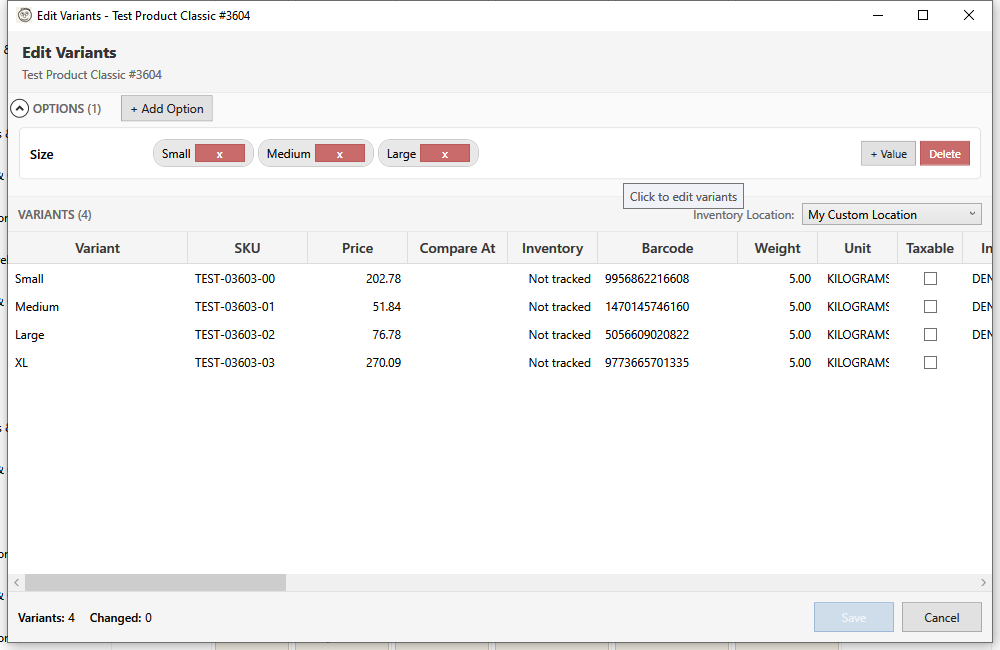
Interface Layout
The editor has two main sections:
Options Panel (Left)
- Lists all product options
- Shows values for each option
- Add/edit/delete options and values
Variants Grid (Right)
- Lists all variant combinations
- Edit price, SKU, inventory, etc.
- Enable/disable specific variants
Managing Options
Adding a New Option
- Click Add Option
- Enter the option name (e.g., "Size")
- Enter initial values (e.g., "Small, Medium, Large")
- Click Add
New variants are created automatically for all combinations.
Editing Option Names
- Click the option name
- Type the new name
- Press Enter to confirm
Adding Option Values
- Click Add Value next to the option
- Enter the new value
- Click Add
New variants are created for the new value combined with all other options.
Reordering Option Values
You can reorder option values using drag and drop:
- Hover over the value you want to move
- Click and drag the value to the new position
- Release to drop it in place
The order of option values affects how variants appear in Shopify and on your storefront. For example, reordering sizes from "Small, Medium, Large" to "Large, Medium, Small" changes the dropdown order customers see.
Tip: Common orderings are Small→Large for sizes, Light→Dark for colors, and Low→High for quantities.
Removing Option Values
- Click the X next to a value
- Confirm when prompted
Warning: Removing a value deletes all variants using that value.
Removing an Option
- Click Delete next to the option name
- Confirm when prompted
If only one option remains with one value, the product becomes a simple product.
Editing Variants
Inline Editing
Edit variant fields directly in the grid:
| Field | Description |
|---|---|
| Price | Variant selling price |
| Compare At | Original price (for sales) |
| SKU | Stock keeping unit |
| Barcode | UPC, EAN, or ISBN |
| Weight | Shipping weight |
| Inventory | Stock quantity |
| Taxable | Whether tax applies |
| Requires Shipping | Physical product flag |
| Country of Origin | 2-letter ISO country code for customs |
| Province of Origin | Province/state code for customs (validated against country) |
| HS Code | Harmonized System code for customs (6-13 digits) |
Bulk Editing Variants
Apply the same value to multiple variants:
- Select multiple variants (Ctrl+Click or Shift+Click)
- Right-click and select Set Value
- Choose the field to update
- Enter the value
- Click Apply
Inventory Management
Setting Inventory
- Click the Inventory cell for a variant
- Enter the quantity
- Save changes
Inventory Tracking
- Tracked - Shopify manages stock levels
- Not tracked - Unlimited quantity (services, digital)
Toggle tracking in the variant row.
Multi-Location Inventory
If you have multiple locations:
- Click Manage Locations for a variant
- Set quantity per location
- Click Save
Variant Images
Assign specific images to variants:
- Select a variant
- Click Assign Image
- Choose from product images
- Click Apply
This helps customers see the right image when selecting options.
Auto-Generate Variants
When adding options, variants are generated automatically:
- 1 option with 5 values = 5 variants
- 2 options with 3 values each = 9 variants
- 3 options with 3 values each = 27 variants
Shopify limit: Maximum 100 variants per product
Deleting Variants
- Select variant(s) in the grid
- Click Delete or press Delete key
- Confirm when prompted
Note: You cannot delete all variants. At least one must remain.
Saving Changes
Click Save to apply all changes:
- Option changes (add/remove)
- Variant field updates
- Inventory changes
Changes are batched and sent to Shopify efficiently.
Keyboard Shortcuts
| Shortcut | Action |
|---|---|
| Tab | Move to next field |
| Enter | Confirm edit, move down |
| Escape | Cancel edit |
| Delete | Delete selected variants |
| Ctrl+S | Save all changes |
| Ctrl+A | Select all variants |
Best Practices
- Plan options carefully - Changing options later can be complex
- Use consistent naming - "Small" not "S" or "Sm"
- Set SKUs - Unique identifiers help with inventory
- Add barcodes - Required for some sales channels
- Don't exceed 100 variants - Shopify's limit
Common Scenarios
Converting Simple to Variable
Add an option to a simple product:
- Open Variant Editor
- Click Add Option
- Enter option name and values
- Variants are created automatically
Splitting by Attribute
Create separate options from a combined attribute:
Before: Size option with "Small Red", "Large Blue"
After:
- Size option: Small, Large
- Color option: Red, Blue
Price by Variant
Different prices for different variants:
- Edit each variant's price individually
- Or use bulk edit for groups
- Use Compare At for original prices
Troubleshooting
"Cannot add more options"
Shopify allows maximum 3 options per product. Consider:
- Combining related options
- Using metafields for additional attributes
- Creating separate products
"Too many variants"
Maximum 100 variants per product:
- Reduce option values
- Remove rarely-used combinations
- Split into multiple products
"Variant SKU already exists"
SKUs must be unique across your store:
- Check for duplicates
- Use a consistent SKU format
- Include option codes in SKU
"Inventory not updating"
- Ensure inventory tracking is enabled
- Check if product is managed by another app
- Verify location settings